Grade 7/8: A Musical Interpretation Set in Aluminum Foil
Session 1:
It began with brushes and pots of black washes of paint, LOTS of big sheets of paper, and music. I should say I mentioned some things like Dadaism, automatic writing, direct response, and then I gave them a demo.
Standing, not sitting, with loaded brush in hand, the music from an old cassette came on. The idea? To paint lines ALL over the page, not thinking, not ‘making pictures’ – just a direct response to the music filling the room. The tempo, the mood, the pace, the repetition, the progression, my own emotion: all would inform the marks put to page. Music change, page change.
Then it was their turn.
Session 2:
Each student had about 10 paintings to choose from, and so I had them select their favourite to take to the next level. After demonstrating the next step, I gave each student a bottle of white glue to squeeze lines of ridges to follow the patterns of the paint. They could make continuous and broken lines, dashes and dots. After the glue dried, the idea was to have a raised surface that reflected the marks on the page. However, school glue did not retain structure, so we found instead we had to use various sizes of string to give us that. So, dipping the string in glue (cut slightly with water) did the trick!
Session 3:
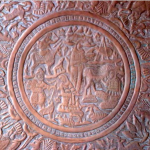
Now that the cardboard drawings were well set with the pattern of raised lines, we painted the entire surface with white glue, and laid down a single sheet of aluminum foil over top. Pressing the foil into the depression of the surface, it was important to work all the details. The final step was to go over the foil with black paint. After drying it slightly, then they wiped and rubbed over the surface with paper towel to remove the paint on the raised details. Suddenly, they looked beautiful …
The result is similar to tooled and beaten metal reliefs from various cultures and throughout history. For our part, we kinda liked ’em.
Early Spring 2012 / Parliament Oak School


You must be logged in to post a comment.