The Warp and the Weft: Weaving With Colour

Grade 2/3 Burlap Weaving

Duration:  2 double classes

After finishing their Snake in the Grass paper weaving project, the students were ready to tackle some weaving proper.  We did a quick review of the 3 W’s.  I told them that they could impress their family at the dinner table that night, throwing those words out there – weaving, warp, and weft.  Woo hoo!

I’ll talk a little about the process at the end of this post, but in the meantime, take a look at these show stoppers …

The class was fresh from the previous project, so only a short review of the weaving process was required (over and under, over …).  This time, however, they would be working with plastic bodkins.

(An aside:  very few people seem to know that word when I say it – and I say it a lot because I am a knitter of mitts and socks in public places.  In this instance, a bodkin is a large dull needle.  My own is a steel one, and excellent for darning  – yes, darning – only my favourite socks.)

In preparation for the class, I cut 5 1/2″ x 8 1/2″swatches of burlap and pulled some of the warp threads out to make room for the students’ weaving.  Various colours of construction paper and chalk and oil pastels were made available to make their frames AFTER they completed their weaving.  To start, however, I showed them how to load up their bodkins with the piece of yarn, and weave it through the spaces left in the warp.

I think it is really important in this lesson to have a lot of yarn pieces pre-cut, though not all.  There is something quite lovely about a mass of balls of coloured yarns that one has to hunt through and discover… maybe that is the just the knitter/scrounge in me.  But the need for yarn pieces for that many students comes thick and fast!  It was all we 3 adults could do to keep up (we even had an extra set of hands with the student teacher that day), and still be available to help any kids at their desks who were having trouble with the mechanics of weaving/threading.

A few students were overwhelmed, at first, at the prospect of weaving/sewing with a needle, but some patient one-on-one again saved the day, and they learned that they COULD do such a thing!  In fact, I was surprised by how much the boys took to this one, and really shone in their results!

When they completed their weaving, it was time to pick a frame colour – I gave them the choice of contrasting/complementary colours, or something more akin to the predominate weft colours used.  They decorated the outer edges with pastel, and then it was over to Mrs. Godwin manning the hot glue gun to attach the burlap to the full sheet of construction paper for ‘framing’.  This was a good time for me to review each student’s results, ask their thoughts, and point out design features to encourage them in their work that day.  I love getting that bit of individual ‘checking in’!

Spring 2011 / Parliament Oak School

Another do-again; and a HUGE THANKS to Phyl at one of my favourite blog sources:  “There’s a Dragon in my Art Room”.  You rock!  (I’d like to meet you some day)

www.plbrown.blogspot.ca


Posted in Grade 2/3 Art Projects | Tagged , | Comments Off on The Warp and the Weft: Weaving With Colour

There’s a Snake in the Grass! / Beginner Weaving

Grade 2/3 Paper Weaving

Duration:  2 double classes

First off, BIG thanks to Deep Space Sparkle artblog for this lesson idea.  Deep Space Sparkle was the first Art Ed website I used to cruise, and it sent me off in oh so many directions (and bookmarks) for ideas that I can’t WAIT to bring to those eager students who stop me in the halls and say, “Mrs. Godwin – do we have Art with you today?”

My idea for this lesson was for it to be a springboard for another, more traditional weaving project AND to have some fun along the way…

Day 1 (double period):

To introduce the lesson and catch their interest we talked a little about snakes; some different types, how they move, what different colours/markings have they, and … what if you could make up your own kind of snake?

We gave them each a sheet of white paper, and I showed them how to draw a snake in pencil:  two wavy lines alongside each other across the page.  One end comes to a point (perhaps), and the other has an oval shape (perhaps), for the head.  They could include design details in pencil if they liked.  I encouraged them to use the whole length of the page – they would want the maximum opportunity to get happy with the luscious oil pastel colours coming up!

This is where it started to get fun – colours that POP by using the pastels to the max.  I didn’t give them a lot of time to fuss over small details in pencil, but brought the pastels on strong pretty quickly, so there was minimal frustration with the medium being less accurate and, well, messy.

After the pastel work, they cut out their snakes (with their name on the back – a step I often forget).  Then it was back to the table at the rear with Mrs. Burton to apply glue and  shake glitter on in the “glitter tray” (a most necessary piece of equipment).  How fun!   We left them to dry for another day.


Day 2 (probably a double session; I can’t quite remember):

Now for the sky.

We gave them diluted white paint to paint a wash of clouds on a light blue sheet of construction paper, then put that aside to dry.

I began the next part with some instruction from the front, introducing them to the 3 W’s:  weaving, warp, and weft.  The warp is the vertical strings that the weft (horizontal) is woven into.  In this case the warp is the grass and the weft is … the snake!  Each student got a full sheet of light blue and 1/2 sheet of green construction paper, and then I showed them how to cut the green on the long side at least halfway down agin and again.  For those who were nervous about their ability with scissors, this proved good practice.

The next step was important for them to understand:  glue the lower half of the green paper (the UNCUT part) onto the lower half of the blue paper (less cloudy?).  The leaves of grass were NOT to be glued YET.

Guess what’s next?  Weave that snake between the leaves of grass (hello Walt Whitman): under and over, under and over, under and – you get the idea.  So interesting to see how they each approached this part.  Some kids struggled at first to understand, a couple were quite sure they couldn’t do it, some were meticulous with every leaf used in succession, others more haphazard.  We helped one-on-one, kids helped each other, and they were all very pleased with their beautiful snakes now hiding or slithering through the grass.  I’d say this was a project they would remember for a long time.

Not quite done, though.  The final glueing of the snake and the leaves over the cloudy sky (a little more instruction needed there) to finish up.  We reviewed them all at the front of the class, with comments from me and their classmates – and then to the walls of the hallway for proud display.  Gorgeous!

(definately a ‘do-again’)

Winter 2011 / Parliament Oak School

www.deepspacesparkle.com


Posted in Grade 2/3 Art Projects | Tagged , , , | Comments Off on There’s a Snake in the Grass! / Beginner Weaving

Today, Our Sculpture Picnic.

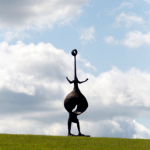
We had a lovely day today with good friends on our way home from skiing in NY State:  on the recommendation of other good friends, we sought out Griffis Sculpture Park.  It is officially open from May through October, but we were still able to enjoy some of the more accessible sculptures found.  What fun to explore those lovely rolling hills in the warm spring air, and for the kids and adults alike to play amidst the artworks…

We had a delicious picnic (we think food tastes so much better when you eat it outside!), then clambered and photo-op’d on one of the favourites:  a meandering wooden structure of multiple plywood cubes and cutaways.  I was busy all throughout with my camera, and here are some of the things I saw.  Enjoy …

We’ll go again, perhaps in May (I’m told there are wildflowers and deer galore amidst the sculptures then).  More pictures!  In the meantime, why not check it out yourself?  (and take a picnic lunch)

http://www.griffispark.org

Posted in Art Along the Way | Tagged | Comments Off on Today, Our Sculpture Picnic.

What if a Giant SOMETHING Came to Town?!

Grade 2/3:  A Lesson in Perspective

Duration:  1 1/2 double periods

We were talking about creating the illusion of distance and space using the relationship between size and fore, middle, and background.  What is the difference in the size of objects when they are closer or further away?  What does the difference in size tell you about the size of objects/animals when they are next to other common objects? What if we were to surprise you?  What if a giant SOMETHING came to town?

These were some  of the ideas and questions I put before the grade 2/3’s one day.  I pulled out my Ziploc bag of magazine picture cutouts with differently sized pictures of animals. Excitement in the class rose considerably!

Each student got one cutout to build their drawing around.  NO trading:  their challenge was to work with what they got, figure out where in the picture plane it would be (fore, middle, back), keeping in mind that it was a giant SOMETHING coming to town …

The students really enjoyed acting on their imaginations, thinking about some of the landmarks in our town, and thinking about the what if?  It was a good day.

Fall 2012 / Parliament Oak School

Posted in Art Education, Grade 2/3 Art Projects | Tagged , , | Comments Off on What if a Giant SOMETHING Came to Town?!

Drawing Cylinders, Drawing Snakes

Grade 5 / Drawing Snakes

The idea was to draw cylinders using a light source to render them 3 dimensional.  So, why not make them snakes?  Snakes coming out of the frame, even?!

(Psst.  I found the idea at Fine Lines blogspot.)

I gave the students different colours of square cardstock and had them intersect it with 3 or 4 snakes in pencil.  They decided which snakes overlapped which.  I cautioned them not to draw the snake markings too intricately, but several of them still did. Too excited about drawing different snakes, I suppose.

Then they continued with oil pastel, using saturated colours.  I gave each student a small picture of a light bulb with sticky tack on the back.  Just as in the demonstration at the beginning of the class where I  used a strong light trained on a neutrally coloured cylinder, they chose where to put the bulb in relation to their artwork.  This little light source tool would help them to remember where the light falls and the shadows fall on their snakes.

Now, armed with black and white pastel, they went over each snake’s colours to correspond to the light source.  This involved a strong white edge and a corresponding black edge, and blending in between.  The blending was done with a stroke going across the body of the snake, and smudging in between.  The colours of the snake could still be seen, but they were now muted with the dark and light.

Some of the students were reluctant to grey down and smudge the brilliant colours and details of their snake, but when they did:  it is amazing how the snakes quickly became 3D, emphasizing that they were escaping the frame (and the picture plane).  Yikes!

Fall 2011 / Parliament Oak School

Posted in Grade 4/5 Art Projects, Grade 5/6 Art Projects | Tagged , | Comments Off on Drawing Cylinders, Drawing Snakes

Op Art Goes Garlic!

Grade 5/6 Op Art Squares

After an introduction to things Op, I had the class follow me in an exercise in drawing garlic cloves!  We had none to speak of in the classroom, but we packed them in our 4″ squares.  Add some colour with three or four pencils, and the 3 dimensionality, well,  takes on a personality.

The squares were laminated, and they will be assembled into a class quilt shortly.  March Break + me + a sewing machine.  I’ll post a picture when it is done!

Fall 2011 / Parliament Oak School

Posted in Grade 5/6 Art Projects | Tagged , | Comments Off on Op Art Goes Garlic!

Start with a Dot

Grade 1/2:

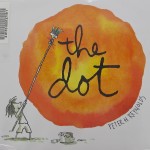
This was a little free project at the tail end of a class.  We were finishing up another, and I had my daughter with me that day, sooo … I had Leah take the kids who were finished out into the hall, and read this book to them.

We had prepared some sheets of paper in advance, with one dot on each – different sizes and different colours.  The task?  Start with the dot and draw out from there.  How will the dot be a part of it?  We gave them some markers and a patch of floor to create their 15 minute masterpieces.   Here are the results:

We will be doing some more cooperative work between the Library and the Art Room … watch for it.

Fall 2011 / Parliament Oak School

Posted in Art Education, Grade 1/2 Art Projects | Tagged | Comments Off on Start with a Dot

Exploring Op Art / Doin’ the Wave

Grade 5 Op Art

The grade 5’s were really jazzed to get at some art that messes with optics (they had been seeing some examples that I had posted on the board).  This one required some concentration on their part, but I am quite glad they persevered:  great results!

I showed them some examples of Op Art from the sixties (Bridget Riley, Victor Vasarely) and on.  Turns out I have a blanket that is derived from Bridget Riley’s design “Breathe”- we decided that looked really cool when we moved it: kinetic Op Art…

We mounted them on construction paper with two toilet paper tubes underneath to make the pattern 3-dimensional, glueing it in place and then removing the tubes.  The waves got wavier, and the optics more interesting.

Fall 2011 / Parliament Oak School

Check out www.op-art.co.uk for more Op Art antics!

Posted in Art Education, Grade 4/5 Art Projects, Grade 5/6 Art Projects | Tagged | Comments Off on Exploring Op Art / Doin’ the Wave

The More of Paper Masks

Grade 5 Paper Masks:  Taking it Further

Part II.

Class 5 & 6.  Just when they thought they were finished with masks, I had them work with them one more time.  The teacher and I paired up the students, with the direction to draw a picture of each other’s mask.  Alright!

We gave them large pieces of paper, which put them on the floor to work, and pencils to sketch out the composition.  The objective for them was to draw the shapes and details of their partner’s mask (using a lot of the page), but to place it in a background of their own making.  It could be an abstract design, background, or a pictorial setting for the mask.

Sharpie markers followed to outline, then oil pastel and tempera paint.  The oil acts as a resist to the water-based paint, so there are some neat effects to be had.

They let loose with this one!  It was an excellent capper to the whole mask project,while introducing some new materials and techniques.  See if you can match the masks with the pictures … not everyone was around for these classes, so not every mask was interpreted/abstracted.


(2 classes needed for Part II)

Winter 2011 / St. Michael School

Posted in Art Education, Grade 4/5 Art Projects, Grade 5/6 Art Projects | Tagged , , | Comments Off on The More of Paper Masks

Paper Masks and More

Grade 5 Paper Masks:  Symmetry, Repetition, Layering

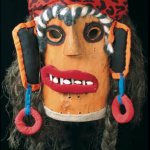
Folk Mask / Nicolae Popa, Transylvania, Romania

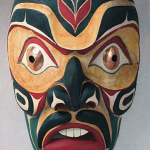
Salish Mask / John Gibson, Nanaimo, BC

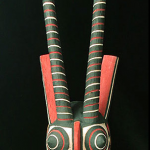
Kaan Mask / Bobo people, Burkino Faso

Part I.

This was an extremely popular project I did with two classes in two schools.  It spanned several week’s work, but the processes and results were well worth the investment of class time.  I will do this again in other years, and grade 5 is well-suited to it.

Class 1.  We spent our time discussing masks:  functions, history, cultures (including our own contemporary one), and their own experiences with them.  I showed them some examples of masks, highlighting materials and design elements, as well as function/meaning, as far as it was known. Their homework was to find a picture of a mask, and come equipped with some details about that mask to present to their classmates.

Class 2 on.  Students presented the pictures of the mask they researched, and we pinned them up around the room to serve as possible references for the next step.  Very quickly, all of our visual vocabularies expanded when it came to masks.

I got the idea for this project from one of my favourite websites:  www.incredibleart.org


Let’s get makin’ masks!!  Each student gets a medium-sized piece of construction paper (their colour choice),  to fold it in half length-wise.  Then, cut out 1/2 of the face shape, using as much of the paper so the masks don’t get too small.  They should have already have decided a rough idea of the shape and overall look of their mask.  At either end of the fold, cut a 1″ or 2″slit along the fold, and then fold one flap over the other.  use white glue for that, and use a paper clip as a clamp until the glue dries. This will make the face 3 dimensional, giving it a forehead and a chin, even the bridge of a nose.

You can start with quick preparatory pencil sketches, if they are having trouble deciding on ideas.   However, if the class is visually adept and adventurous, no pencils are needed.

By using the scissors and glue to build their mask directly, they can respond more directly to the papers available and what they can do. Different paper shaping and cutting techniques were covered, and I encouraged them to cut multiples of shapes to achieve layering, repetition, and a balanced symmetry.  The idea was not to replicate any given mask, but to use their imagination and ideas from those gathered to make their own.  Along the way, I nudged them to go a little further with details to create interest.  Since it was purely a cut paper construction, I resisted their desire to use pencils or markers for fine details.

The energy and enthusiasm (and mess) throughout the classroom was just great, as bits and pieces of paper I have collected over the years found use as ears and noses and eyes and whiskers.  The masks weren’t meant to be worn, so a support made of a popsicle stick was attached to the back with generous applications of masking tape, and then hung with monofilament.

We wrapped up this session with a review of the masks, encouraging remarks on design from me, and inviting comments from the students. We hung them in the classroom, and I think they were quite pleased with their efforts over all.  I’d agree!

(4 classes needed for Part I)

Winter 2011 / St. Michael School

If you want to see some more masks:

www.masksoftheworld.com   www.mnh.si.edu/arctic/features/yupik/intro.html

(just to get you going)


Posted in Art Education, Grade 4/5 Art Projects, Grade 5/6 Art Projects | Tagged , , | Comments Off on Paper Masks and More