Amate Paper Cutouts

Grade 4/5:  Exploring Symmetry with Paper Cutouts Screen shot 2013-03-11 at 2.28.37 AM

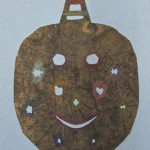
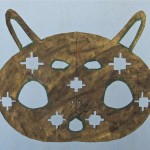
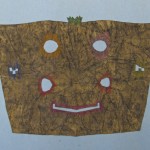
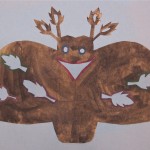
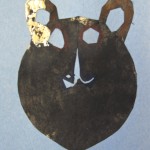
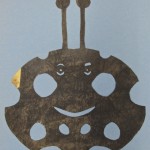
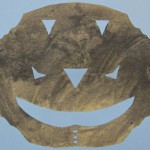
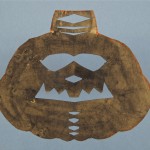
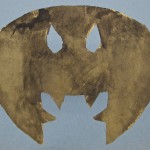
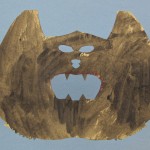
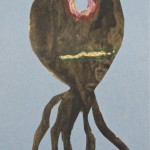
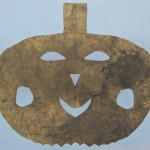
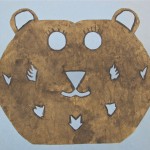
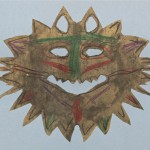
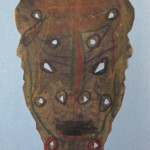
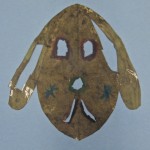
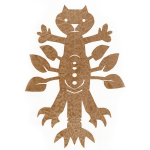
The discussion began with the idea of symmetry and mirror image, and then we went on to looking at the Otomi people of east central Mexico (Pueblo region).  The women produced paper bark from fig and mulberry trees, making symmetrically cut figures.  The cutouts described animal and human and god figures, often invoking fertility or rain, or other beneficial forces.

I demonstrated how to get a symmetrical cutout by folding the paper lengthwise and cutting along the spine of the fold.  We did this project close to Halloween, so I gave them an opportunity to do two:  a jack o’ lantern and a animal from their imagination.  The latter could be a composite of different animals, and I encouraged them to draw it out first and to go for interesting profiles and interior cutouts.

IMG_2820 IMG_2819 IMG_2818 IMG_2817 IMG_2816 IMG_2831 IMG_2830 IMG_2829 IMG_2828 IMG_2827 IMG_2826 IMG_2825 IMG_2824 IMG_2823 IMG_2822 IMG_2821


Thanks to Julie at www.artforsmallhands.com for the idea on this one!

Fall 2012 / Parliament Oak School


Posted in Art Education, Grade 4/5 Art Projects | Tagged , | Comments Off on Amate Paper Cutouts

Blind Contour Gets Wired

Grade 6:  Taking Contour Drawing Further

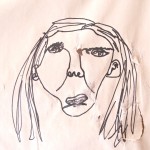
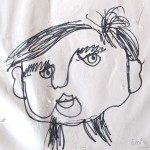
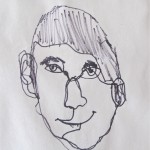
In the class following the first blind contour drawings, we continued with drawing self portraits.  Everyone got a mirror, and with fresh instruction about drawing from close observation – out came the Sharpies again.  They really had to trust the process and not be impatient with the results.

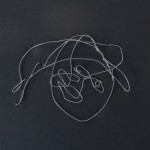
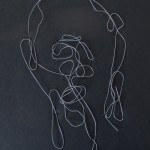
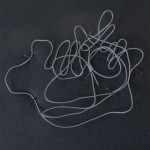
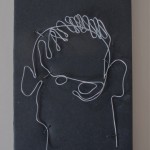
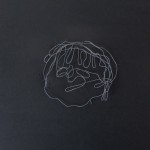
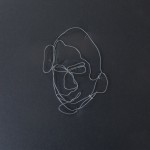
After several drawings were done, they picked the one they thought most interesting.  We got out the galvanized wire, needle nose pliers, and masking tape.

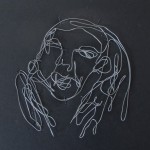
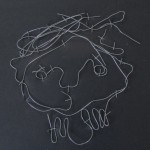
Carefully following the lines of the drawing, they bent the wire to replicate.  At first, I directed them to do it, as with the pen drawing, in one continuous line.  Masking tape was used to hold it in place as they went along.  This proved problematic as the twisting caused the paper to lift and made it difficult to get all the details.  It was better to cut the wire when needed, though not too often.  Too many small pieces would not hold together.  This took a few classes to complete.

When finished, we lifted the finished wire drawings carefully from the paper and stapled them to black foam core.  Further revisions meant attaching plywood behind the foam core.  This gave the staples something to bite into and hold, and to attach a hanger on the back.  Quite lovely results, I think.

Winter 2013 / Parliament Oak

Posted in Art Education, Grade 5/6 Art Projects | Tagged , , | Comments Off on Blind Contour Gets Wired

Our First Light Drawings

Grade 6:  Drawing With Light

The students have been studying electricity, and had just finished some work with contour line drawing, so …

We took some time to play!  I told them about artists who use long exposures, movement, and specific light sources in the dark to draw.  We darkened the art room as best we could, put up a black cloth background, and handed out flashlights (some with coloured homemade filters) and, best of all, my husband’s laser pointer.

I set up my camera on a tripod, and we trained our lights and/or laser on the black background.  Later, we tried running back and forth in front of the camera to create an image.  It was kinda fun, and a different progression from traditional line drawing.

I edited the pictures on my computer, and for the next class they will have an opportunity to work with a couple of commercially processed pictures, abstracting them further.  Watch for it!

Winter 2013 / Parliament Oak

Posted in Grade 5/6 Art Projects | Tagged , , | Comments Off on Our First Light Drawings

No Peeking: We’re Doin’ Blind Contour

Grade 6:  Drawing Blind Contour

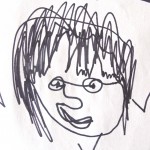
I wish you could have seen the kids’ faces … I told them we were going to do some drawing BUT they had to do it in one continuous line (NOT lifting the pen from the page) and that they could not look at the page (not even once) while they were drawing.

A couple of students remembered doing this sometime somewhere else, but for most it was a totally new thing.  I demonstrated what I meant by drawing my own hand.  They laughed at my drawing, but wait.  Their turn. Haul out the Sharpie markers and the newsprint, and take a close look at their non-drawing hand.  One, two, three – go!

As they looked at the details, I instructed them to have their pen follow their gaze as they examined the outline of their hand and the details within (don’t forget those fingernails and knuckles), and don’t lift the pen until they stopped.  More laughter ensued, and I knew this was a good exercise.

We then carried on with drawing a partner’s face in the same method.  I talked about the how’s:  drawing not what they thought a face should be, but what they actually saw as their eyes travelled across the facial features and details of the hair.  For some, this was a stretch.  For some, the discipline of not looking was too much.  I think you can tell where true blind contour happened and where it did not.  Still, definitely a good lesson in drawing and loosening up.

Fall 2012 / Parliament Oak

Posted in Art Education, Grade 5/6 Art Projects | Tagged , | Comments Off on No Peeking: We’re Doin’ Blind Contour

Drawing a White Still Life

Grade 7/8:  Using Pencil Shading Techniques / White on White

After each student completed their shading line exercises, it was time to take that and apply it to a drawing.  I set up an all white still life of basic geometric shapes, with a strong light trained on one side (chiaroscuro).  Their challenge was to observe the modulations of light and dark, and use the techniques learned to render the still life elements to have volume and mass.  I had to encourage them NOT to draw outlines, but to use their shading to define the different items.  One can see that some students couldn’t get away from outlining, which serves only to flatten out the shapes.   They were not to draw the background, though this may have contributed to the muted results.  This lesson was a struggle for some, but I think it provided a learning opportunity for them.  Now they will take that on to the next project, where they will do a pencil drawing of a photo collage they put together.

Parliament Oak / Fall 2012

Posted in Art Education, Grade 7/8 Art Projects | Tagged , , , , | Comments Off on Drawing a White Still Life

Some Things We Are Working On …

Currently, in the Art Room:

The grade 2/3’s are an enthusiastic bunch I have to keep up with – and they seem to celebrate anything I throw at them.  Just gotta stay one step ahead!

The grade 4/5’s have been looking at those wonderful works by the Tjanpi Desert Weavers of central Australia.  How fun!  They have each chosen an animal/bird/reptile indigenous to our area – the Niagara region – and have done preparatory sketches.  They are just beginning to built their animal armatures.  Soon, they will begin to wrap their sculptures with scraps of fabric, yarn and string.  Colour – and not in any way you would see it in the wild.

The grade 6’s have been exploring blind contour drawing, and learning to make close observations of what they see.  We are taking it to the next level and rendering one of their self portrait drawings to a wire copy. Hmmm … bending that wire and keeping it down is proving to be a little tricky.

The other grade 5/6 class is about to begin pen and ink landscapes next week, and we shall see how that goes – NOT my area of expertise ( though I do rather like to write with a fountain pen or two).

One grade 7/8 class has been learning techniques of shading using pencils – watch for that post.  They are about to begin a more personalized project:  drawing a simple photographic collage they put together with photos from home.  After that, I am thinking some clay would be great …

The other grade 7/8 class is stringing their looms and just beginning to weave their personally designed wampum belts.  They learned a little about the Iroquois and other nations’ use and examples of these earlier in the year, along with their studies of indigenous culture in Social Studies.  We are using pony beads, so I am hopeful this one won’t drag out too long for them.

Posted in Grade 4/5 Art Projects, Grade 5/6 Art Projects, Grade 7/8 Art Projects | Comments Off on Some Things We Are Working On …

3D Zentangles, Boxed

Grade 4/5 Altered Zentangle Drawings

This was one of the first projects of the year, though I have only photographed them recently.  It was going to be like a lesson I did in a previous year, but a couple of students reminded me that that they had already done it then – the shifting of split grades mixed me up.  (I was horrified to realize that one of the few times I have repeated a lesson winds up being with students who can say ” We already did this with you, Mrs. Godwin”  Yikes.)

So, quick thinking needed on my part (there were only three students having to repeat):  we would do the cut and laminated zentangles as before but this time apply them onto black boxes instead of a flat sheet of black paper.  Then we could hang them with monofilament from the ceiling … yeah!  (Ducking the motion sensors, of course)

Our process for this project is described in my 2010 posting “Grade 3/4:  Line Drawings Go 3D!”

Fall 2012 / Parliament Oak School


Posted in Art Education, Grade 4/5 Art Projects | Tagged , , , , | Comments Off on 3D Zentangles, Boxed

Sounds Like Christmas Bells!

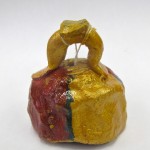
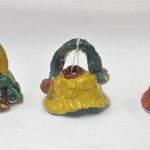
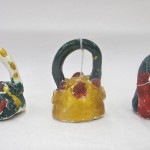
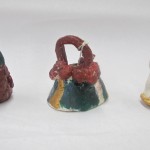
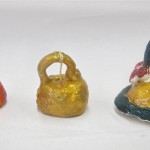
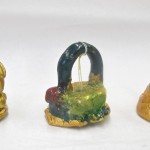
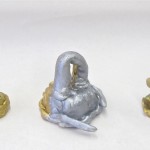
Grade 2/3 Clay Pinch Pot/Bells

We needed some seasonable fun, and those grade 2/3 faces were just the ones to receive it!

(Plus, I was just so glad to get back to some kind of clay work)

Class 1.

There was already an excitement in the classroom even before we got started when they saw it was a clay day.  Woo hoo!!  We stapled canvas strips from my studio to the oak tables for work surfaces, and each student willingly donned a smock to begin.

Only a couple had ever made a pinch pot before, so I demonstrated from the front, making a small smooth ball and then digging in with my thumb to begin slowly pinching round and round from the bottom up.  Not too much water – just moistened hands would do it.

Cutting a triangle out of the rim and reconnecting those edges would keep the finished bell from flaring out too much.  The clay was soft enough that one didn’t really need to score and slip to join it, but I showed them that anyway as an option.  the next step was to drill a small hole in the bottom of the pinch pot using a pencil – this was for the string to pass through for the action of the bell.

Three more clay parts remained to be made:

1) roll a “snake” on the canvas table about as long as your hand.  That’s going to be your handle.

2) roll a small ball about the size of a marble.  Take the pin tool and put a small hole in it:  ALL the way through.  You should be able to see the light through the hole. When you swivel the pin tool in the ball it will make the hole bigger, and that will help when the clay shrinks in the firing.  This is the “clapper” – they were quick to figure what that term meant.

3) there should be some little bits of clay left over.  Roll them, flatten them out to make embellishments on the bell it self.  Maybe even a real skinny long snake to make a fancy rim!  These will require some scoring/scratching on both the part and the bell to help attach.

Now it was time to put them together!

I encouraged them to use the scoring technique when joining the handle to the pinch pot bell, and any of the applique decorations. They would need to press firmly when attaching, and smooth out any cracks.  I supplied them with small damp sponges to help with that. (Not water – too much will  create more problems with weakening and cracking) We set the bells with their clappers inside for drying and firing.

Class 2.

The bells were now bisque fired, and there was no time for glaze, so I gave them acrylics and modge podge to finish.  They happily chose their colours (and one can see that the gold was particularly popular) and got to painting.  The teacher and I threaded the clappers and tied them through to the handle.  Modge podge was applied to preserve the paint, give some gloss, and fix the string.

You know?  They sounded pretty good, and the kids were so proud of their gifts to take home.


Posted in Art Education, Grade 2/3 Art Projects | Tagged , , | Comments Off on Sounds Like Christmas Bells!

Synthetic Cubism and Even More Guitars (and Violins!)

Grade 7/8 Drawn and Altered Collage

Class 1.

Moving on from their earlier lesson & project on Cubism, we spent some more time looking at images of the movement that evolved out of it: Synthetic Cubism.  We looked at the work of Braque and Picasso where still life constructions were further abstracted:   elements cut up, shifted, and no longer simply drawn or painted.  Instead, applied elements were used – collage both 2d and 3d low relief in the form of other patterned papers, cardboard, and text. Visual puns were sometimes used, just by including a word or a material/picture that has other associations.  The picture plane fractured, and different views could be seen at once.

Let’s take a look, and I’ll report on our class’s process and how it went.

Before diving into it, we reviewed some elements of composition that we covered in the first lesson in Cubism:  focal point, balance, repetition and change, relating elements, symmetry and asymmetry.  these projects were definitely going to be more asymmetrical than not, and having a focal point (point of interest) was going to be very important.  These were posted on the white board for them to reference later.

I set up two still life’s – one with Brian’s guitar and the other with my violin.  Students could gather around the one they chose.  On large sheets of manilla construction paper (because that’s what we have a lot of in the school), they were to do a line drawing of the composition before them, drawing from close observation (with reminders to watch for proportions, relationship of objects to one another, scale, and details to provide interest).

Class 2.

Working by example on the board, using magnets and sticky tack, I cut up an unclaimed line drawing of a guitar (from one of the other guitar lessons this year), and began to rearrange their placement and orientation with pieces of wallpaper, newspaper, and the odd cutout of a word or letter.  Piles of the similar materials were placed throughout the room, and soon papers were flying as students gathered their materials, cutting out bits, discussed what they saw in the newspaper, and began fracturing the images.

This was an instructive time for me to see the reactions of different students to the project so far.  Requiring this level of abstraction and with so many choices to make gave some a sense of excitement and interest to see what they could do.  Others found it confusing and even daunting to assemble a composition.  For them, there was a danger of foundering, doing nothing, and losing interest.  A few found this part frustrating.  It was quite a task keeping pace with all of these things going on (or not), and attending to them individually! (Mrs. Godwin – Mrs. Godwin – Could you help me? – Mrs. Godwin!)

I continued to stress the elements of composition as marked on the board,  especially getting that focal point.  I also encouraged them NOT to glue down their different pieces too soon onto their fresh sheet of manilla.  It would be better for them to move the pieces and try out different arrangements out before deciding on the final assemblage.  Only then could they glue down the parts.

Class 3.

Of course, different students were at different stages – they get a double class, but it only comes round every 10th school day (throw in some missed classes due to other events happening, students missing days, and you begin to get the picture).  Makes for a long time for such a project to finish.

The finishing of this one involved them working back into their composition with washes of paint – translucent is best so that what is already there is not masked out – and their choices of charcoal stick and/or chalk pastel.  The idea was to augment, to tie things together,  perhaps emphasize areas of interest and (you guessed it) focal point!  Some were fighting project exhaustion at this point, but others found it freeing to briefly return to that way of working.

PHEW!  We covered a lot of ground with this one, especially with the first Cubist project thrown in there, and I would say that the results are pretty interesting – even though they can not convey how much was learned about Art History, technique, making visual decisions creatively, and the experience of pushing perception beyond the obvious.

I think our next project will have to be something quite different. Clay, perhaps?


Posted in Art Education, Grade 7/8 Art Projects | Tagged , , , | Comments Off on Synthetic Cubism and Even More Guitars (and Violins!)

Three Guitars

Grade 5 & 6 Painting / Colours as Music Genre


This project brought out some of the guitar heroes I didn’t even know about – it was very cool to hear from some of the kids who have been learning guitar, or have a parent who plays guitar at home or even in a band.  Awesome!

I showed them some website clips from local artist Peter Swanson who builds one-of-a-kind electric guitars: pictures of his guitars (he’s named each one!), and performance videos.  Dagmar Guitars:  how fun!

I brought in an acoustic guitar borrowed from a talented musician friend, Brian Andres.  Set up at the front of the classroom, it provided the starting point for the students to draw a guitar.  I encouraged them to draw from observation, noting proportions and details.  I wish I could have had an electric guitar as well, but it turned out that those who wanted to draw one (most of the boys – surprise surprise) were well familiar with their shape and any extra parts peculiar to that instrument.  Having an acoustic before them was still of some help, though.

We talked about different genres of music – the mood and energy  associated with jazz and rock and country music.  We talked about colours, hot and cold – and the mood and energy associated with them.  Matching those colours with the different music styles would communicate something about the genre and the guitar they chose to paint.  Text in the form of stencilled letters would accompany the guitar as another graphic element.

        JAZZ                                 ROCK                         COUNTRY

Pencils out, working on large card stock:  they spent the rest of the class and into another working out their composition and drawing their guitars.  I learned a little more about some of the students, the music they listen to, and experiences they’ve had.

From there it was time to paint!

They began with painting the background, choosing colours that would reflect the mood of the music, be it jazz be it rock be it country.  I loaded their trays with two or three colours, with directions to mix them on the page as they painted.  Contrasting colours were chosen for the text, and the guitars were painted last.  I encouraged them to paint the pencil lines of the strings in black paint, but many were exhausted with the painting or simply ran out of time. That was unfortunate because I think that step really helped to finish the work.  Still, many came off pretty well …

So, thanks to Ted Edinger at his ‘Art with Mr. E’ blog for his idea and those great examples from one of his Art Camps.

www.artwithmre.blogspot.ca

www.dagmarcustomguitars.com

Also, search Pinchdogs/Rootstock on Youtube for some of Brian’s music videos.

Posted in Art Education, Grade 5/6 Art Projects, Grade 7/8 Art Projects | Tagged , , | Comments Off on Three Guitars